
But first, we will discuss why you would ever need to use Firebase instead of Bubble’s own Database. Why Bubble’s Database isn’t well suited for certain applications and how Firebase can become handy for those applications. Let’s get started and integrate firebase with bubble.io app.
Firstly the basic difference between the two is that Firebase is a NoSQL while Bubble uses a SQL-based database that is hosted on AWS Servers. A SQL database is usually slower than a NoSQL database, but it can perform certain tasks faster.
NoSQL is best suited for those scenarios where we don’t have to calculate large amounts of data and retrieve those results, e.g videos, images, messages, etc.
As we are using a Firebase bucket, we can only send and receive data using their id and if we use bubble’s database for such applications that require just basic data saving and retrieving will be noticeably slower. It is advisable to use Firebase when creating a database for your project.
Note: I will only suggest using firebase’s bucket if you are good at using API calls with your workflows in Bubble
Step 1. Navigate to https://firebase.google.com/ and sign-in in the top right hand of the page
Step 2. After creating an account and signing in, start creating a project by clicking the “Add Project” button.
Step 3. Fill out the highlighted fields in the window that pops up. Name your project anything you want.
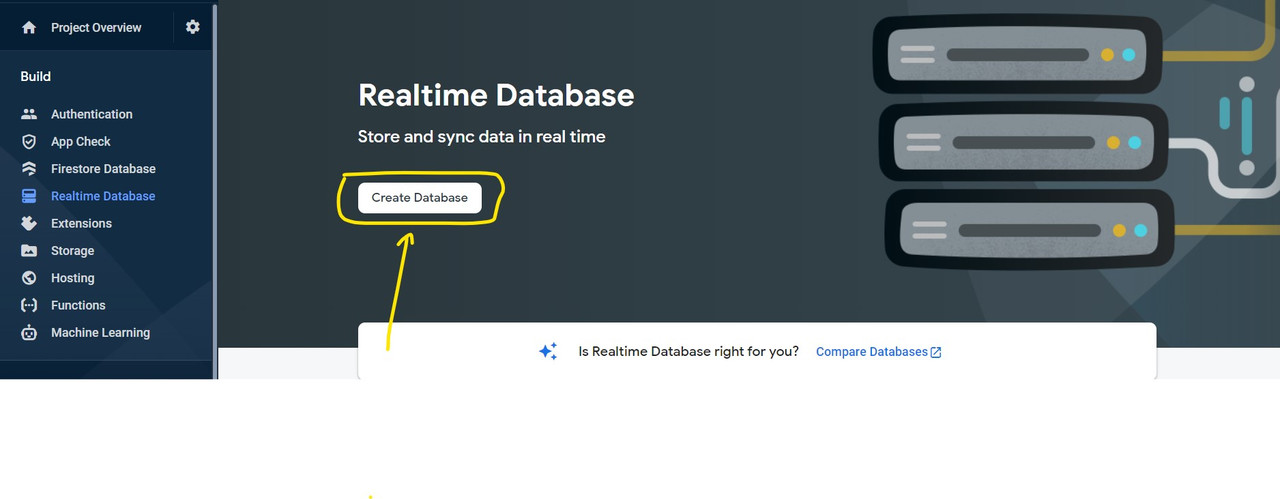
Now that you have created your Firebase account and added a new project. Click on Realtime Database in your navigation panel and create a new database.
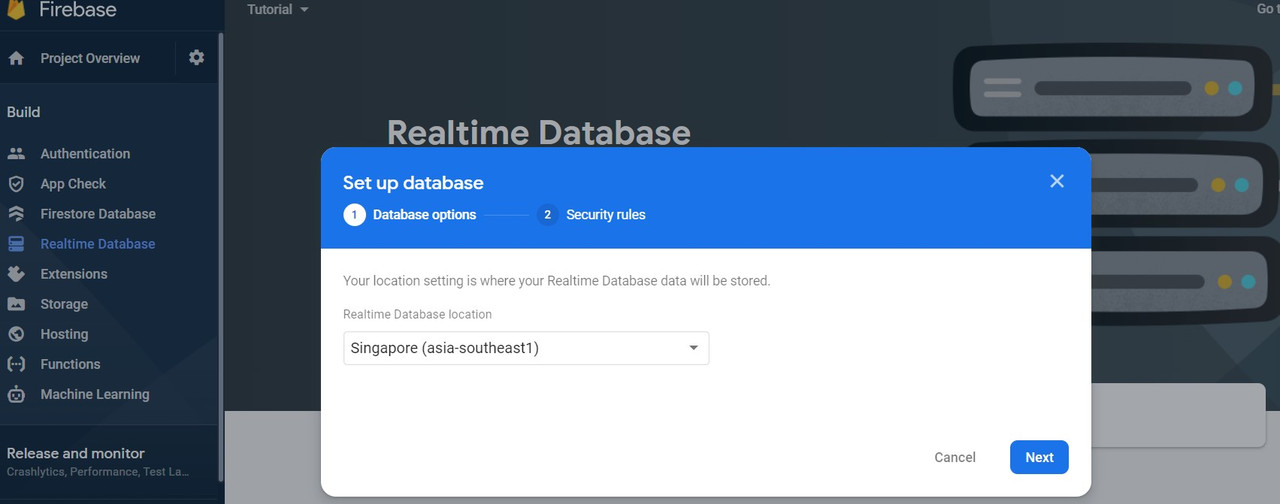
The next step is to select your demographic region. You can choose any of the available regions.
In the next tab, select security rules to Start in Test Mode.

Copy the link and now hover on the 2nd link. It will show + option
click on + and create dummy data as shown in the 2nd image.


Now lets move on to your Bubble.io application
Add API Connector from plugins and create an API call.
Steps:
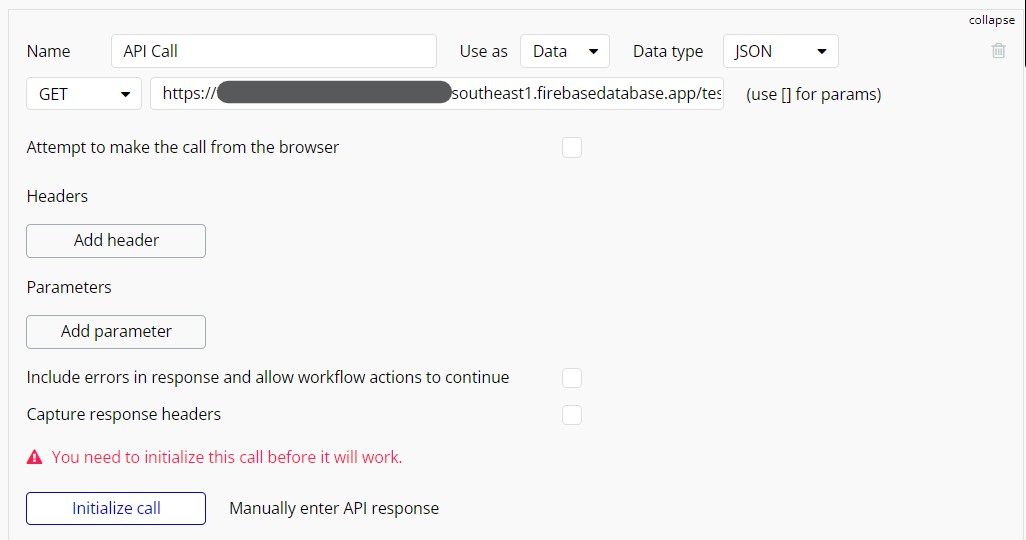
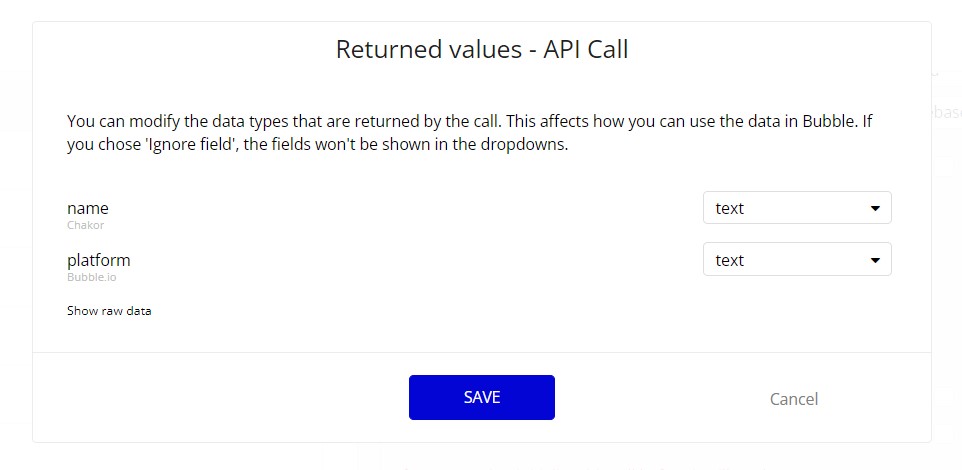
You should be able to view the following data after intializing the call
Also, check out our latest posts for more bubble.io tutorials. Happy bubbling!

.svg)